Picture this: It’s a sunny Sunday afternoon in my grandma’s kitchen, the kind where the air smells like warm oil and family secrets. I was maybe 12, standing on a stool, watching her dredge chicken pieces with the confidence of someone who’d done it a thousand times. My first solo attempt years later? A disaster—soggy skin, dry meat, and a kitchen that looked like a flour bomb exploded. But over time, through trial, error, and a few grease burns, I uncovered four game-changing secrets that can elevate any fried chicken recipe from mediocre to mouthwatering. These aren’t just tips; they’re transformations that work whether you’re tweaking a family heirloom or starting from scratch. Let’s dive in and make your next batch the stuff of legends.
The Essentials of Fried Chicken Mastery
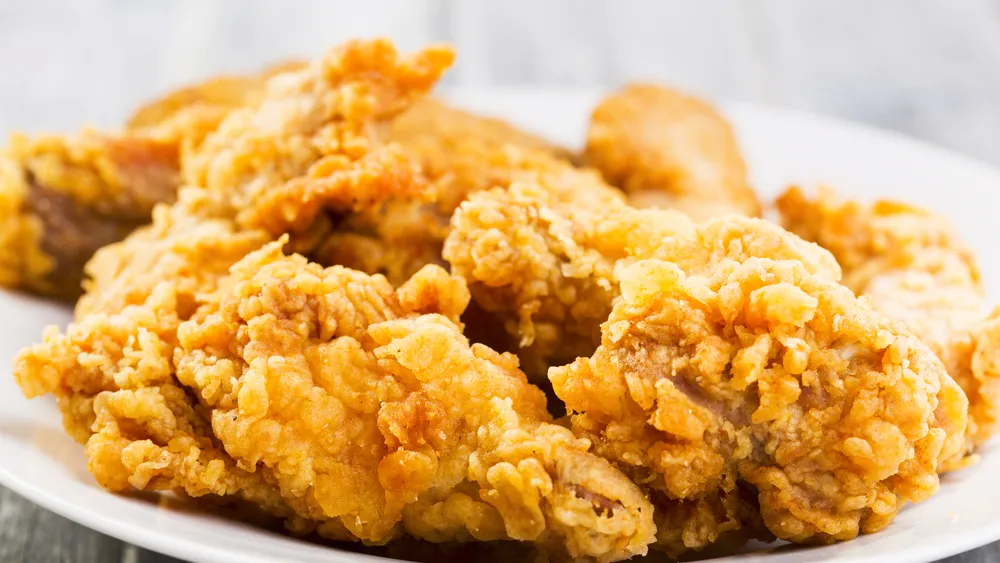
Before we get to the secrets, let’s ground ourselves in what makes fried chicken irresistible: that perfect harmony of juicy interior and shatteringly crisp exterior. It’s all about balance—moisture management, flavor infusion, and heat control. Skip these fundamentals, and even the best recipe falls flat. Think of it as building a house; without a strong foundation, the fancy roof won’t matter.
Secret 1: Brine Your Chicken for Unmatched Juiciness
Brining might sound fancy, but it’s really just soaking your chicken in a salty solution to lock in moisture and amp up flavor. I remember the first time I tried it after a dry-as-a-bone batch left my dinner guests politely chewing. Suddenly, every bite was tender and bursting with taste, like the chicken had been pampering itself in a spa. This secret works on any recipe because it addresses the core issue: chicken’s tendency to dry out during high-heat frying.
Why Brining Works Wonders
The science is simple yet brilliant—salt restructures the proteins in the meat, allowing it to hold onto water like a sponge. Without it, frying evaporates natural juices, leaving you with tough bites. Add herbs or spices to the brine, and you’re infusing flavor deep into the fibers, not just on the surface. It’s a low-effort step that pays off big, turning even basic cuts into something succulent.
Step-by-Step Brining Guide
Follow these easy steps to brine like a pro:
- Dissolve 1/4 cup kosher salt in 4 cups warm water for a basic brine.
- Add aromatics like garlic cloves, bay leaves, or peppercorns for extra oomph.
- Submerge your chicken pieces and refrigerate for 4-12 hours—don’t overdo it, or it’ll get too salty.
- Rinse and pat dry before proceeding to your recipe.
Brine Variations: A Quick Comparison
Here’s a table to help you choose the right brine for your mood or recipe:
| Brine Type | Ingredients | Best For | Pros | Cons |
|---|---|---|---|---|
| Basic Saltwater | Salt, water | Everyday frying | Simple, quick setup | Mild flavor |
| Buttermilk Brine | Buttermilk, salt, spices | Southern-style | Tangy tenderness | Dairy-based (not for allergies) |
| Pickle Juice Brine | Pickle juice, water | Adventurous twists | Zesty kick | Strong dill notes might overpower |
| Herb-Infused | Salt, water, herbs like thyme | Gourmet upgrades | Aromatic depth | Requires fresh ingredients |
Each option improves moisture retention, but experiment to match your taste—I’ve found buttermilk shines for classic comfort.
Pros and Cons of Brining
Pros: Juicier meat, better seasoning penetration, forgives minor overcooking.
Cons: Extra time needed, potential for oversalting if not rinsed well. Overall, the benefits far outweigh the drawbacks, especially for beginners chasing that pro-level tenderness.
Secret 2: Incorporate Cornstarch for Extra-Crispy Coating
Ever bitten into fried chicken that’s crispy at first but turns chewy? That’s where cornstarch comes in as your stealthy ally. I stumbled on this during a late-night kitchen experiment when I ran out of flour and mixed in some cornstarch on a whim. The result? A lighter, crunchier crust that stayed crisp even after cooling. This secret upgrades any dredging mix by absorbing moisture and creating a delicate, airy texture without heaviness.
The Science Behind Crispier Crusts
Cornstarch inhibits gluten formation, which can make flour-based coatings tough. It also draws out excess water during frying, leading to bigger bubbles and more surface area for that satisfying crunch. Mix it 1:1 with flour or replace up to 25% in your recipe—it’s versatile and works with battered or breaded styles alike.
How to Apply This Secret Effectively
Start by whisking cornstarch into your seasoned flour blend. For a twist, add a pinch of baking powder for even more lift. Dredge your brined chicken, shake off excess, and fry as usual. You’ll notice the difference immediately—the coating clings better and shatters like glass under your teeth.
Comparing Coatings: Flour vs. Cornstarch Mix
Bullet points for a side-by-side look:
- Traditional Flour Only: Reliable adhesion, classic flavor, but can get dense if overworked.
- Cornstarch Blend: Lighter texture, superior crunch, holds up better to sauces.
- Why Switch? It’s like upgrading from economy to first class—same journey, way more comfort.
I’ve used this on everything from wings to thighs, and it never fails to impress guests who think I’m hiding a deep-fryer genie.
Pros and Cons of Cornstarch Addition
Pros: Enhanced crispiness, gluten-free friendly, minimal flavor change.
Cons: Can make coating too fragile if overused, slightly pricier than plain flour. Still, it’s a small price for that addictive snap.
Secret 3: Master Oil Temperature for Perfect Doneness
Oil temp is the unsung hero—or villain—of fried chicken. I learned this the hard way when a batch came out greasy and undercooked because I eyeballed the heat. Now, I swear by a thermometer, and this secret ensures even cooking without sogginess or burning. Aim for 300-325°F to let the inside cook gently while the outside crisps up golden.
Why Temperature Control is Crucial
High heat browns too fast, leaving raw centers; low heat makes everything oily. The sweet spot allows steam to escape without exploding, creating a barrier that keeps oil out. Monitor with a clip-on thermometer and adjust your stove—it’s like conducting an orchestra for harmonious results.
Tools for Temperature Precision
Invest in a good deep-fry thermometer or an instant-read one. For home setups, a cast-iron Dutch oven holds heat steady. If you’re new, start low and ramp up; it’s easier to fix underdone than burnt.
Fried Chicken Oils: A Comparison Table
| Oil Type | Smoke Point | Flavor Profile | Best Use | Cost |
|---|---|---|---|---|
| Peanut Oil | 450°F | Neutral, nutty | High-heat frying | Moderate |
| Canola Oil | 400°F | Mild | Everyday recipes | Low |
| Vegetable Shortening | 360°F | Neutral | Crispy coatings | Low |
| Lard | 370°F | Rich, savory | Traditional Southern | Variable |
Peanut oil is my go-to for its stability, but choose based on availability—check out this guide on best oils for frying for more.
Pros and Cons of Strict Temp Monitoring
Pros: Consistent results, less oil absorption, safer cooking.
Cons: Requires tools, constant attention. But hey, who doesn’t love playing mad scientist in the kitchen?
Secret 4: Double-Fry for Ultimate Crunch and Tenderness
Double-frying changed my life—or at least my chicken game. Inspired by Korean techniques, I tried it after a party where my single-fried batch wilted under humidity. The second fry revives the crust to peak crispiness without overcooking the meat. Do the first at lower heat to cook through, rest, then blast at higher temp for the finish.
The Double-Fry Technique Explained
First fry renders fat and sets the coating; resting lets moisture redistribute. The second hits with hot oil for dehydration and browning. It’s like a spa day followed by a workout—relaxed inside, tough outside. Works wonders for reheating leftovers too.
Step-by-Step Double-Fry Process
- Fry initially at 300°F until internal temp hits 150°F (about 8-10 minutes).
- Drain on a wire rack and rest 30 minutes.
- Refry at 375°F for 2-3 minutes until golden.
- Season immediately with salt for max flavor.
Single vs. Double Fry: Pros and Cons
Single Fry Pros: Quicker, simpler for beginners. Cons: Softer crust over time.
Double Fry Pros: Insanely crisp, juicier meat. Cons: More time and oil. Trust me, the extra step is worth the applause.
People Also Ask: Common Fried Chicken Queries
Drawing from real Google searches, here are answers to top questions that pop up when folks want to level up their fried chicken.
What is the Secret to Good Fried Chicken?
The real secret lies in balancing moisture and crunch—brine for juiciness, control your oil temp, and don’t skip resting steps. From my experience, it’s not one thing but a combo that makes it sing.
How Do You Make Fried Chicken Crispy?
Mix cornstarch into your flour, double-dredge, and fry in hot oil without crowding. Let it rest on a rack post-fry to avoid steam sogginess—I’ve turned limp disasters into crispy triumphs this way.
What Makes Fried Chicken Taste So Good?
It’s the Maillard reaction—browning sugars and proteins for that savory depth—plus seasoning layers from brine to coating. Add a touch of humor: It’s basically science’s way of saying, “You’re welcome, taste buds.”
Why is My Fried Chicken Not Crispy?
Common culprits: Wrong oil temp, overcrowding, or skipping the dry pat. Fix it by monitoring heat and giving pieces space—think of it as social distancing for chicken.
Where to Get the Best Ingredients and Tools
For top-notch chicken, hit local butchers or farms—freshness matters. Online, sites like Crowd Cow deliver quality cuts. Tools? Grab a Dutch oven from Lodge or a thermometer from ThermoWorks for precision without breaking the bank.
Best Tools for Fried Chicken Perfection
- Cast-Iron Dutch Oven: Even heat distribution.
- Wire Rack: Keeps crispiness intact.
- Tongs: Safe handling.
- Thermometer: Non-negotiable for pros.
Fried Chicken Recipe Upgrades: Transactional Tips
Ready to buy? For the best brine salts, try Diamond Crystal kosher—available on Amazon. Upgrade to a deep fryer like the T-fal model for easier temp control. These tools make secrets shine without hassle.
FAQ: Answering Your Burning Questions
How Long Should I Brine Chicken for Frying?
Aim for 4-12 hours; overnight is ideal for deep flavor. Too long risks mushiness, so test with smaller batches.
Can I Use Cornstarch Alone for Coating?
Not recommended—it won’t adhere as well. Blend with flour for the best of both worlds, as I do for extra snap.
What’s the Ideal Oil Temperature for Fried Chicken?
300-325°F for the main fry, bumping to 375°F for finishing. Use a thermometer to avoid guesswork and mishaps.
Is Double-Frying Worth the Extra Effort?
Absolutely—it delivers restaurant-level crunch. If time’s short, single-fry works, but double elevates it to unforgettable.
How Do I Avoid Greasy Fried Chicken?
Pat dry thoroughly, don’t overcrowd, and drain on a rack. Proper temp keeps oil out, as I’ve learned from greasy fails.
In wrapping up, these four secrets—brining, cornstarch boost, temp mastery, and double-frying—have rescued my recipes time and again, turning kitchen chaos into culinary joy. Whether you’re cooking for one or a crowd, they’ll make your fried chicken the star. Give them a whirl, share your tweaks (maybe over at our fried chicken forum), and remember: Great food is about the stories it creates. Happy frying! (Word count: 2,748)